Alpha 40 is now released, lots of new features and fixes/cleanup. The main new feature is level of detail profiles for effects where you can adjust the emitters in effects so that they behave differently depending on the distance from the camera. We’re very close to the first beta release now, they’ll be one more Alpha release and then I’ll be freezing the library format so things stay stable from then on out.
Level of Detail
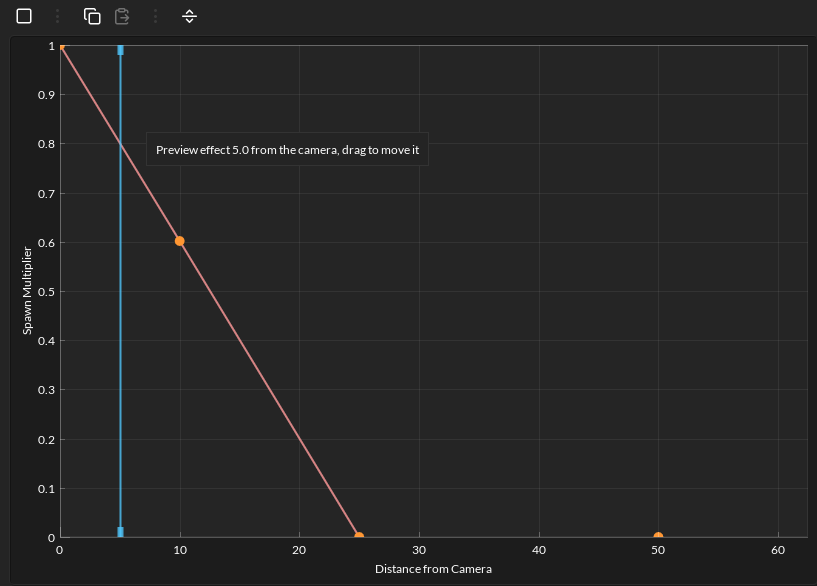
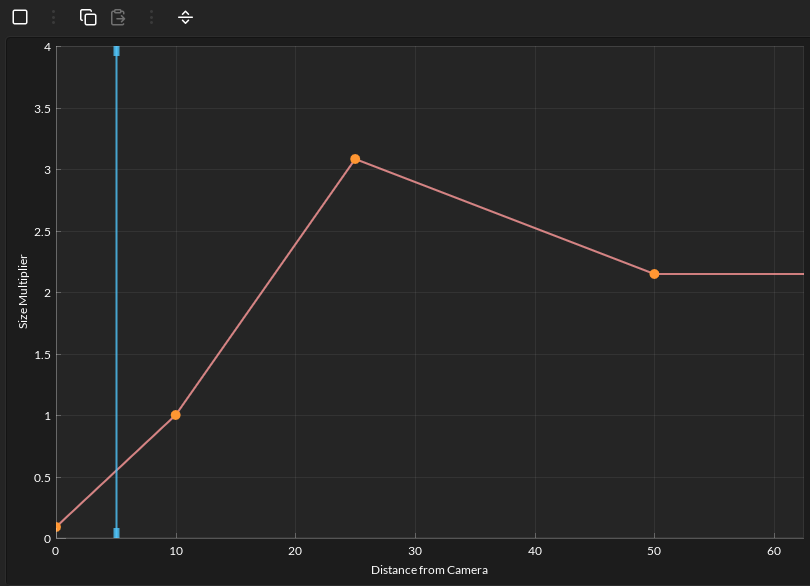
I’ve added a new effect property treeview under effect properties for level of detail. This allows you to set bands where for each emitter you can change the spawn rate and size multipliers for those emitters so that they look different at different distances – the main intent being that they will take less to compute the further away they are. For example if you have a fire with a lot of embers then you can reduce the spawn rate at higher distances but also increase the size so that the embers can still be seen. You can also go the other way and reduce the size of particles the closer to the camera you are to help reduce fill rate.
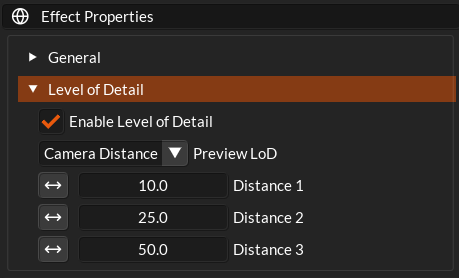
There are 3 fixed distances under the effect properties. Then in Spawn Rate and Size under Behaviour overtime you can decide how these attributes change based on the distance.
New ribbon geometry type and clean up
I’ve added a new method to build ribbons – Half Pipe. This produces ribbon geometry that curls the ribbon around a half pipe giving a look similar to Always Face Camera but a fuller look that can look better from different angles. This type also gets a new property to go with it called tessellation that increases the number of triangles across the breadth of the ribbon for more smoothness of the half pipe.
I also improved the Frenet Serret frame and renamed it to Minimal Twist. It was never really a proper Frenet Serret frame algorithm anyway and it had issues, minimal twist prevents it folding back on itself at certain angles.
Another new setting – Roundness – is for lit layers and makes the light shade it like a tube the closer to 1 the value is.
Revamped Layer system
The layer system has been completely revamped. When Timelinefx used to be a 2d only particle effects system the layers were used to separate particles on to different layers like you would images in Photoshop. But now with this revamp the layers are used to separate particles and ribbons into different drawcalls where you can specify different pipelines and/or shaders. This allows you to draw the particles completely differently in your renderer either with different blendmodes, draw to the depth buffers or use a completely different pixel shader depending on the effect you’re trying to create.
In the editor there are 2 default layers, default and depth. The Default layer is the same layer that timelinefx always drew to, with premultiplied alpha allowing for both additive and alpha blended particles and ribbons based on the Blend Factor graph. There’s now also depth which draws to the depth layer and discards pixels based on an alpha threshold.
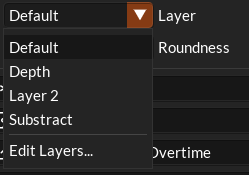
When you click on Edit layers you will see a pop up window where you can add new layers and edit those newly added layers. The first 2 default layers cannot be edited.
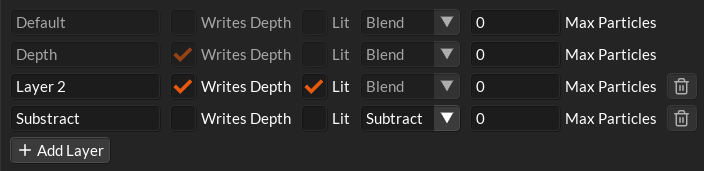
- Writes Depth: check this to write the particle/ribbon to the depth buffer so they can be easily ordered. You lose transparency when using this option though.
- Lit: Check this to light the particles and ribbons drawn on this layer.
- Blend mode: The default is pre-multiplied but you can also select from multiply, subtract and absorb.
- Max Particles: You can budget the layers if you want to put a cap on the number of particles that can spawn there. Leave as 0 for uncapped.
Revamped hide/show emitters
I’ve removed the Eye icon from the preview tab that was used to hide/show emitters, there’s now the same icon next to the emitters in the library treeview so that you can easily hide or show any emitter you want for different combinations. I also added a small icon on the left side of the treeview item to show at a quick glance whether the emitter is a particle or ribbon emitter.
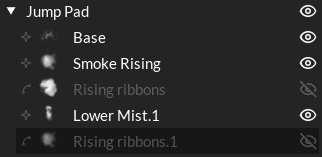
This behaves the same as the old hide/show in that the particles are still simulated when hidden they’re just not drawn.
All this plus a whole bunch of other fixes/improvements. As mentioned they’ll just be one more alpha release before beta. The final alpha will have a lot of stress tests and overall stableness testing plus a couple more new features. Full list of changes are here:
- Spawn drag and other properties dragfloats show 3 decimal places but speed is .01
- Fixed issue with export to .tfx that keeps adding .tfx to the name even if it already has it.
- Autoplay effect wasn’t working for burst effect
- Cleanup: Removed all the recording machinery out of the library and into the editor.
- Cleanup: Removed unused functions or move into editor if it’s only used there.
- Same layer system for ribbons so they can be drawn with different pipelines too.
- Separate pipelines for depth buffer drawing for particles.
- Refactored the layer system in the library for max layers of 64 and user layers for custom pipelines.
- Effect now restarts when bezier curves is enabled in the graph tab
- Added new half pipe ribbon type with tessellation count option
- Reworked Frenet Serret Frame and renamed to Minimal Twist, now prevents unwanted folds at certain angles.
- Replaced the eye icon on the preview toolbar and put it inline on each emitter so you can switch on/off the emitters that you want.
- Optimised the preview bloom pass, faster and uses less memory
- Initial preview view no longer flickers and can be interacted with.
- Fixed gimbol lock issue with orient emitter to camera.
- Bitmap emission type has better handling of filled/non filled grid emission
- Clicking and dragging ribbon noise properties to another ribbon emitter no longer copies more then it should.
- Implemented real-time for emitters and a global hue for the effect
- Add LoD features/profiles for emitters and effects.
- Removed some old unused bounding box code.
- Added new blendmode flags for layers for multiply, substract and absorb blendmodes.
- Emitter properties now give more instant feedback when editing them where it makes sense to do so.
- Property flags like Grid Emission, reverse spawn direction etc., will now update gpu simulated emitters in the preview window without needing to restart first.
- Disc emission type now only shows X and Z on the emitter size graphs.
- Added an eye icon next to the effect that toggles all emitters in the effect hidden or showing
- Added a small icon next to each emitter that shows whether it’s a particle or ribbon emitter.